This is not my original idea, I got that from this genius lady- Here -she has a great blog with lots of great ideas, go check it out!
She made smaller round sit upons for individuals. I wanted a big one where you could lay on it too, or share with others. Well, if I'm being honest I also didn't feel like cutting the table cloths, so I made them the same size as a round vinyl table cloth. I'm lazy like that. ;)
You will need:
2 round vinyl table cloths.
1 large piece of quilting batting (I found mine on clearance at Joann's for $6 for a full size blanket size, which was way more than I needed but cheaper than the smaller ones there) and
Some ribbon (I ended up using 22 feet of it, but used a coupon and only paid $5.36 for 24 feet) I used the left over ribbon to keep it rolled up (seen below)
Sewing machine-or you could hand sew it, but trust me, you do not want to do that!
Thread & pins
You first put one of the table cloths upside down on the floor.
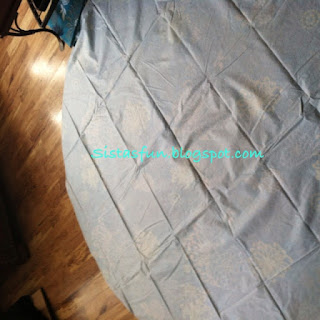
Then you top with the batting, then cut the batting to fit all the way around it. This was my only
cutting, yay!

Now time to top it with the other table cloth, right side up.
Congrats, you made a sandwich! :) now pin it all in place so the seams come together evenly.

No now this is the not so fun part, and you could actually skip this step, but I recommend you do it because it made it so much easier for me! Iron your ribbon in half! Won't take too long, but that even crease is a life saver.

Now time to sew the ribbon on. I just put it between the two vinyl table cloths and sewed it all the way around. Yes, it took forever, but not as bad as I thought it would be. In no time it was done, and now we have a fun sit-upon!

My son and our dog loves it already, but from the blurry pic you can tell she doesn't sit still. :)

Fold it up and tie it with the extra ribbon! Easy, light weight and waterproof unlike a blanket.

Have fun creating!
~V