Showing posts with label Tutorials. Show all posts

Picnic or Beach lay upon


This is not my original idea, I got that from this genius lady- Here -she has a great blog with lots of great ideas, go check it out!

She made smaller round sit upons for individuals. I wanted a big one where you could lay on it too, or share with others. Well, if I'm being honest I also didn't feel like cutting the table cloths, so I made them the same size as a round vinyl table cloth. I'm lazy like that. ;)

You will need: 
2 round vinyl table cloths.
 1 large piece of quilting batting (I found mine on clearance at Joann's for $6 for a full size blanket size, which was way more than I needed but cheaper than the smaller ones there) and 
Some ribbon (I ended up using 22 feet of it, but used a coupon and only paid $5.36 for 24 feet) I used the left over ribbon to keep it rolled up (seen below)
Sewing machine-or you could hand sew it, but trust me, you do not want to do that!
Thread & pins

You first put one of the table cloths upside down on the floor.
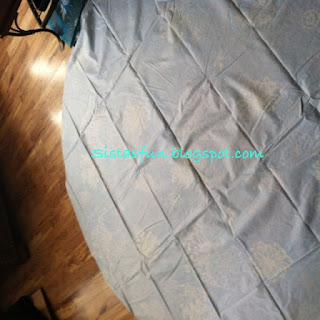


Then you top with the batting, then cut the batting to fit all the way around it. This was my only 
cutting, yay!
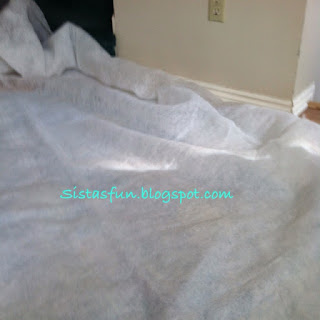


Now time to top it with the other table cloth, right side up.

Congrats, you made a sandwich! :) now pin it all in place so the seams come together evenly.


No now this is the not so fun part, and you could actually skip this step, but I recommend you do it because it made it so much easier for me! Iron your ribbon in half! Won't take too long, but that even crease is a life saver.


Now time to sew the ribbon on. I just put it between the two vinyl table cloths and sewed it all the way around. Yes, it took forever, but not as bad as I thought it would be. In no time it was done, and now we have a fun sit-upon!


My son and our dog loves it already, but from the blurry pic you can tell she doesn't sit still. :)


Fold it up and tie it with the extra ribbon! Easy, light weight and waterproof unlike a blanket. 

Have fun creating!

~V

Shabby Chic Ruffled Diaper Cake

Shabby Chic Ruffled Diaper Cake

Sometimes I dream up something, have these great ideas, but then when I attempt them, well....lets just say they do not quite turn out the way I envisioned. Yet somehow this project turned out exactly how I envisioned it, and I am in love!

Several,years ago I made my first diaper cake, which you can see Here . I was looking at changing the normal diaper cake and make it a little more elegant. This time I had an opportunity to make another one for a family member-in fact I am giving her a baby shower, and I am so excited! I will have to share pictures afterwards. :)

Fun with Frames, and Printing on Fabric

For my daughters birthday I decided to make her something for her, and her husband's home. Been wanting to try my hand at printing on fabric too. I can't wait to see them on her wall! Thought they would look great as a grouping. :)

I bought some cute frames at Hobby Lobby (make sure it's the week they are on sale at 50% off!) that have no backings on them. I bought some scrapbook paper to match her colors, and cut them to fit 2 of the frames. Spray painted an "N" for her last name, then glued it on one of the frames with paper, and then printed on fabric for the other frame. Added some sparkles cause we all need some sparkles in our life! Cut up a cardboard box for the backs to keep them all in place (I was going to staple them in but I ended up taping the backs so she could change them later if she wanted to).


Ok, now my advice to you all on the printing. You must use an inkjet printer. Best fabric to use is Muslin or Linen type. I used Burlap and it worked well but not as well as the other types I tried. Now, I totally am warning you now, do not use Felt!! Umm....let's just say the fuzziness of the fabric drags along and smears all the ink. ;-)

To print, you will need your printer, card stock paper, fabric, and a spray on tacky spray like Rustoleum's tacky glue which worked perfect for this! You can find it in craft stores.

Take your fabric, cut it to fit the card stock, at this point you can cut it a little big if you want some overlap for the spraying purpose. Take it all outside (you want good ventilation for this spray) and some newspaper to put down for the card stock to be sprayed. Spray the card stock well around it's edges and all around. Then take your fabric and drap it over the card stock. Smooth out the fabric, it will be easy to get out any wrinkles at this point, then let dry for 10 mins. Now, cut around the fabric to match up the lines perfectly so the paper runs through the printer without snagging onto something inside and jamming it.

Put it in your printers tray by itself upside down (least this is how my printer pulls and prints onto my paper, if your not sure, mark a paper first and send it thru) then set up your graphic to print (make sure you tell the printer it's card stock going through) then print. Walla!

You can pull the fabric off the card stock right after, as long as you sprayed on the card stock and not the fabric it should be fine. I found though with me wanting to frame this I left it on the paper so it stayed smooth and taut.

This idea works for fabric you want to make pillows with, or quilting blocks. I am told you can wash the fabric afterwards in cold water, air dry. Let me know if you try this, would love to see your project! I have more to come because it's so darn fun and easy!

Have fun creating!
~V

Sewing a Perfect Seam

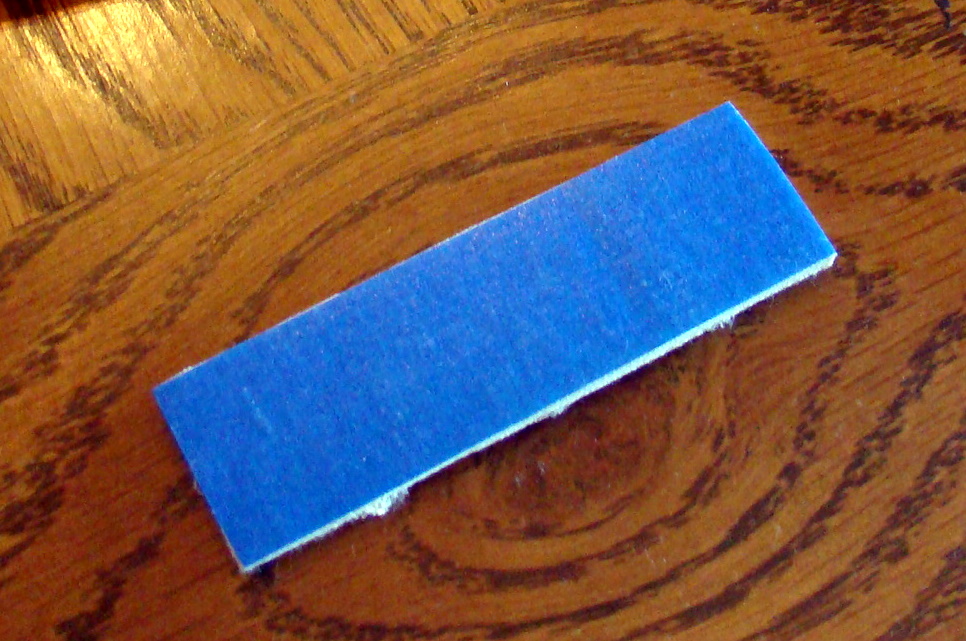
Blue painters tape is fantastic, but even better, Molefoam!  It gives an excellent ridge for the edge of your material.  One of my students commented that it would leave a residue behind, but if you use painters tape WITH the Molefoam there is no residue.  When sewing 1/4" seams, this is especially nice to have!

Molefoam from Walmart foot section, and this was a little thicker than what I'm used to buying, it was perfect.

Peel back the backing on the Molefoam and lay the non-sticky side of some painters tape on it.  Trim the edges and along the edge of the tape.

Stick the blue sticky side down along the guide on your sewing machine.

Put your presser foot down so you get as close to the needle as possible but without placing over the feeds.

See?  Perfect 1/4" seam.

When you're not using it, just stick it on the side of your machine.  When the tape wears out, you can just replace it.

~Jen

30 Minute Pillow Cases

7/8 yard fabric of your choice("case")
1/3 yard coordinating fabric("cuff")
matching thread
chalk or disappearing ink pen to mark
ruler or guide
scissors
rotary blade(optional)
pinking shears
sewing machine
iron
standard pillow form

You can wash your fabric if you like, I didn't after teaching this class to several kids(8-10 year olds) and have tweaked the instructions.  Turn fabric right sides together, matching selvage edges.  Trim up cut edges with rotary blade or mark with ruler and cut with sharp scissors.  Piece will measure approx. 22"x28".  Pin and sew 2 sides 5/8" seam, the selvage edge and one cut edge so you have a wrong-side-out-large pocket.  If the selvage edge designer markings/color swatches show when you turn it right side out, simply measure and sew again.  The exact measurement of this side is not important.  You will match up the "cuff" next. 

Fold the "cuff" piece wrong sides out and iron.  Trim up edges by cutting off about 1" on each side to make cuff approx. 10" wide.  Match the cuff's folded edge to the case's folded edge.  Mark with chalk or disappearing ink where the sewing line is and draw a line from cut edge to cut edge.  This will be your sewing line.  After you sew the cuff's selvage edge, press seam open and turn right side out.  You will have a large circle.  Fold wrong sides together now, lengthwise so cut edges of the cuff line up and all you see is the right sides, folded in half.  

Case should be turned wrong side out.  Place cuff inside case and line up cut edges of case and cuff together, lining up folded edge and sewn seams.  Pin into place.  Sew using a 5/8" seam until you meet your starting point.  Leave needle down and lift presser foot, and change stitch to a zig zag stitch.  Sew around the cuff again until you meet your starting point again.  Trim off excess fabric all the way around.  Using pinking shears trim up both sewn sides of case, snipping corners.  Iron the cuff/case seam towards the darker material.  Turn case inside out and using the tip of your marker push the corners out to get a nice sharp corner.  Iron.  Insert standard pillow form and VOILA!  Admire your work! 


~Jen

Upcycled plastic yarn tote bag, part 2

The alternate title for this post should be, "How to Crochet Round Stuff." I know there are tons of crochet tutorials online. I don't know if I'm bringing something new, other than my cute, chubby hands. I tried to take some good pictures that really show the process. And it is long. I hope you are patient. But here you go.

You will want to start by making a simple loop. Like a cancer or AIDS awareness ribbon. Except this one is made out of a plastic bag. I hold this with my left hand.


Now, I'm a rightie, I grab my crochet hook with my right hand. This is a 9-millimeter hook, so pretty big. The letter size of it is N. I believe I got it for about $2, something like that.

Use the hook to grab the long tail of your loop and pull it through the loop. (Now I keep wanting to call it a ribbon. No, it's a loop.) It should look about like this:


Then pull it tight, this way, so what you have is basically a slip knot:


Use the hook to grab the long end again, and pull it through the loop that's left on the hook. This is called a chain. If you were reading a crochet pattern, they abbreviate that as "ch" and tell you how many times to do it. But we are not using a pattern here. We're crocheting by heart!


Upcycled plastic yarn bag

All right, tonight we are doing a little upcycling. If your shopping bag holder is overflowing or you haven't been making it in to take the bags back into the recycling bin at the store, or if you're feeling guilty about stuffing them all into the garbage, this is the project for you. It is easy and fun and best of all, absolutely free (well, you might have to spend a dollar or two on a crochet hook).


Make your own Halloween black flowers


Simple project!

You will need:
Crepe paper
Floral wire
Floral Tape
Double sided tape
Floral Foam
Bowl or pot to put them in

______________________


Halloween Pumpkin Fun


This is the only time I like Mice in my home! lol!

You can do this project on real pumpkins, or artificial ones like I used.

Shabby Chic Coffee Table

~Before~
        
                                                                                                              
~After~


                     I started this project for my daughter and her husband for their combined birthday's. :)

Wrapping Gifts a Different Way


Why not make the wrapping a box that can be used later on? Add some fun homemade PomPom's! (instructions below)

Make a ring/jewelry glass holder

Different kind of Door Wreath


I decided to do a new door wreath for my lonely door, and I sure love square or rectangle shapes more than the traditional round wreath. All of this cost me around $6.00 to make too!

Silverware Art


This was a fun project. I went to a local thrift store and bought different forks, knives and spoons. I also bought old frames from there too-to make this awesomeness!

Tissue Paper Fun


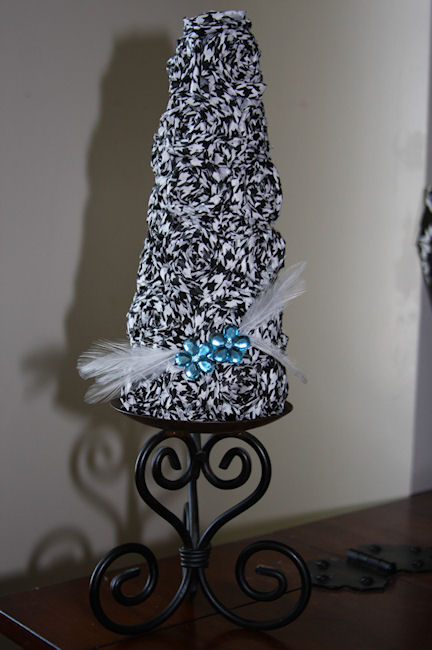
This was a fun project, but it did take time like my others (can't seem to get past that hmmm...) There are several ways to do this, but I chose the rosette looking flower instead of the fluffy one (I will try that one next)Of course I had to glam it up with feathers and bling for fun, but you could do it anyway you want, or leave it plain.

Great thing is it is cheap!

Picture or Recipe Holder


~Make your own unique picture or recipe holder~

Twirl Certified Skirts


So here are the ingredients:
1. one measuring stick (or substitute for a 3x5 index card)
2. one of something to cut with (utility knife, sissors, teeth)
3. one sheet of cardboard at least 18"x5"
4. material (I use 5 different colors) - you'll need 15 inches of each
5. pineapple.  Not sure why that's there, but it looks good, right?
6. 1" elastic - cut to however round your waist is
7. pencil
8. sewing machine
9. stitch ripper (not because *you* need it but because *I* need it)
10. paddle (to threaten children who take your scissors to bring them back)


Related Posts Plugin for WordPress, Blogger...