

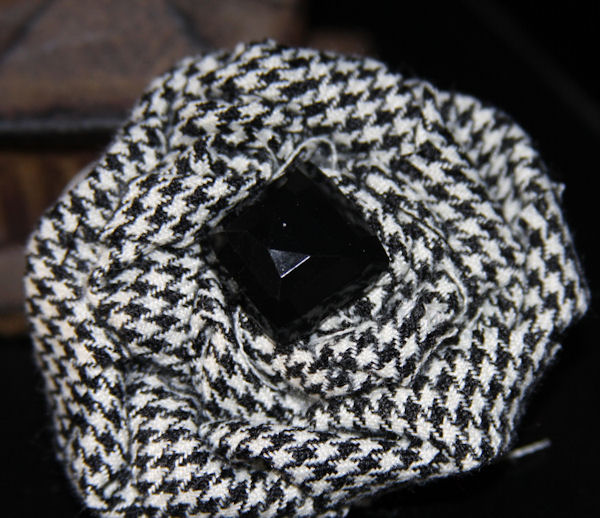
My daughter and I started making fabric flowers 2 years ago when we wanted to make some extra money. I still sell and make some now for custom orders- but I thought it might be fun to teach everyone how to make them too if you want.
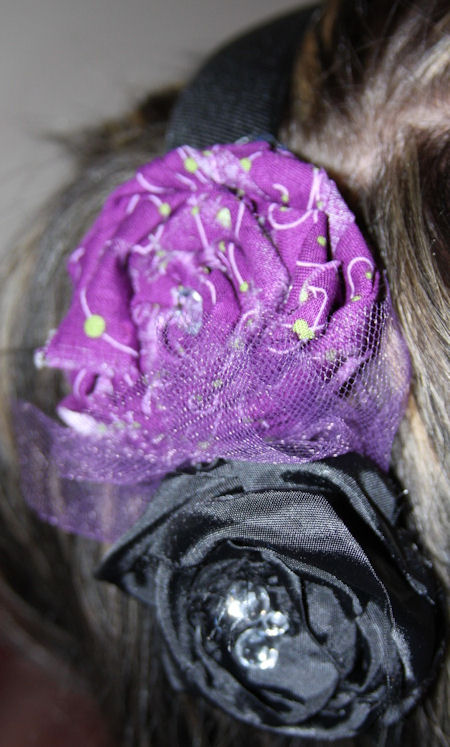
We made them into pins (like the one pictured above) and into headbands like this one:

Or into bracelets:

They can even be hooked onto necklaces

What you will need:
Glue Gun (I recommend a low-heat one, less burning of your poor fingers)
Fabric- I used ribbon or cut cloth into strips
Felt material- or a harder backing for the back
Pin/and or hair clips for the backs
Optional items:
Buttons, beads, feathers, etc.
Headbands or bracelets, etc.
____________________

Start out with a long strip of material or ribbon (the longer it is, the bigger the flower will be, and the thicker the strip is the more full the flower will be, but you do not want the material strip to be too thick)
Make a knot on the end of the fabric

Make sure you have your hot glue gun ready at this point

You will need to glue as you go to get a strong flower. I twist the material with one hand while I hold it together with the other

You will twist the material as you go around the middle-do not twist too tight or you will have a pinwheel looking flower. You will want to twist lightly and go around half way of your middle and glue a little beed on the bottom edge, and press the fabric over it, wait a few seconds then start twisting some more

Just glue on the half way mark each time around. (sorry no pic of gluing since I did not have anyone to take a picture of me doing it) When you are at your end, just twist and glue it under the flower so it doesn't show.
Then cut out a piece of felt or a harder back piece of felt (I found some at a local craft store) and glue it on the back of your flower to hide your inner hole so you can put a pin or hair clip in the back with the glue gun.

I put ribbon on this hair clip to hide the clip a little

Even tulle:

We even clumped different colors together for headbands:


You can use any material, and I love the ragged edges on some, but if you don't you will have to make sure you get a material that has the same pattern on both sides and twist harder so as not to have the edges show. The hardest material to work with in this style is silk type, it just is very slippery.
Attention:
I also recommend you play around with the material and twisting several times BEFORE gluing! It takes awhile to get used to the technique and style you will like. I found it took me awhile to like my way of doing it, and I really like the looser twists in the end.
Good luck and have fun!!
~V

No comments:
Post a Comment