

I posted the coffee filter ball I did earlier here , and finally challenged myself to finish the wreath.
So for those who didn't want to mame a few books like I did with my book wreath here - here is another fun project to do. Only thing is.....patience is needed.
___________________
Supplies needed:

1. Glue Gun-again I recommend a low heat one, helps with the burns!
2. Coffee Filters- I bought them at a dollar store.
3. Wreath- I also bought at a dollar store(and I would have preferred a styrofoam one but I wanted it thinner than what was there so used this wicker one instead)
4. Scissors.
5. Lots of time and patience. 2-3 hours depending again on the munchkins.
Optional items:
Tulle/Fabric/Ribbon for embellishment.
Brooch/Bling
Fabric Flowers - like I made here!
____________________
Like the coffee filter ball you will first want to fold your filters in half:

Then in half again:

Then one more time:

Try not to press on the scalloped edges too much, just the bottom of the filter
At this point you will now glue inbetween the folds at the bottom of the filter (I just use a tiny dab inbetween so they stay together) then put glue on the outside of one side and press it onto the wreath & go all the way around it like this:
Try to make them all the same length.

Once your done turn it right side up like we did the book wreath:
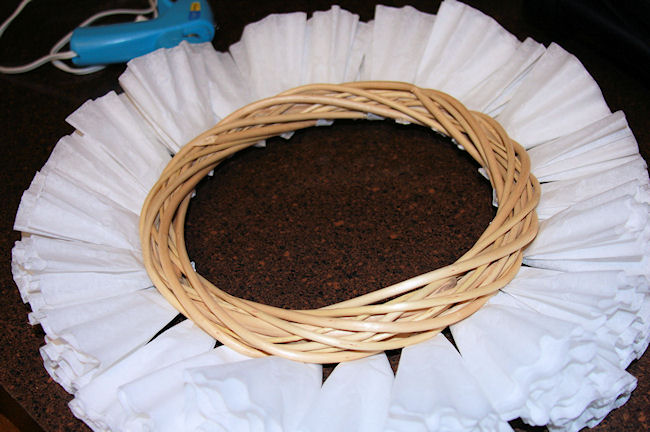
Since this wreath is thinner-at this point I decided to do the inner part of the wreath- gluing them all the way around:

Again try to keep them all the same length-and do not worry about the bald spots, you will fill those in later.

Now you will start filling it in the middle. Since this was a weird surface wreath I chose to leave the tips on the filters for most of the middle too, but bent their tips to try and keep the lengths the same.
After you have gone around the whole wreath you will see some bare spots- this is where it is easier to cut the tips off the folded filter like we did for the ball:

Then find the bare spots, and put them in with the glue on the ends.

Go all the way around until your satified with the results (but be warned sometimes if your a perfectionist like me your never happy, and you just have to quit before the headache gets worse!) Now it's time to use the scissors to cut some of the edges to make them all somewhat the same size like we did the ball:

Now your done!

You can leave it plain, or you can now add some fun to it.
Like Fabric Flowers:

Or ribbon and bling!:


During Christmas you could even add a silk poinsetta flower to it!
Just have fun!!
If you do make any of these projects I would love to see them.
~V

No comments:
Post a Comment